
Create an Auction
A walk through and guide to FAQ's around creating your auction.
Auction
How do I create my auction?
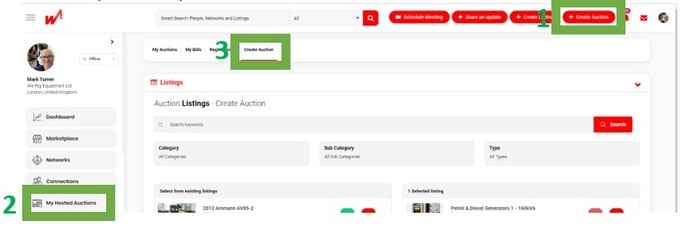
To create your auction, you have two ways to achieve this. Click the “Create Auction” button at the top right-hand corner of your screen (1) or go to your main navigation dashboard on the left-hand side of your screen, select “My Hosted Auctions” (2). From here, you can click on “Create Auction” at the top of the page alongside “My Auctions | My Bids | Registrations” (3) you will then need to follow 7 steps to create your auction.
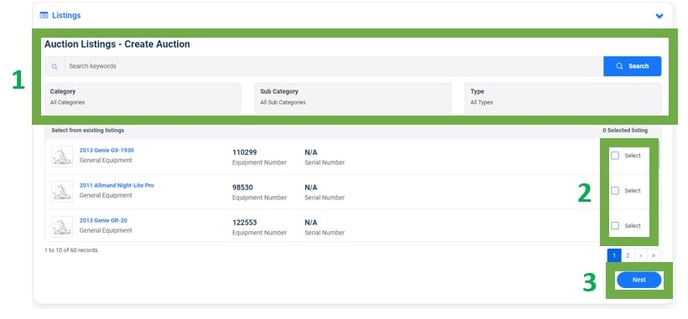
Listings- Here you can select from your existing listing which ones you wish to enter your auction. You can use the search bar and filters to narrow down your listings list (1) or browse the full list too where you can then easily select each item using the “Select” tick box (2). Once you have selected your auction items then click “Next” (3).
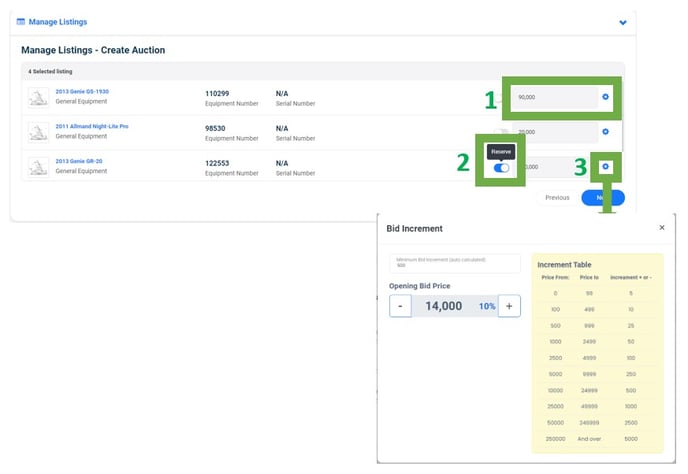
Manage Listings- This step allows you to not only set the pricing for each of your item lots (1) but also set reserve pricing should this be required (what is this?) (2). Once you have set your price, you can then click on the cog icon next to the price field (3) and set the opening bid price (what is this?) and have confirmation on the Minimum Bid Increment. Once all the pricing information is updated click “Next”.
Settings- From this step on we are no longer working with individual listings, rather your whole Auction.
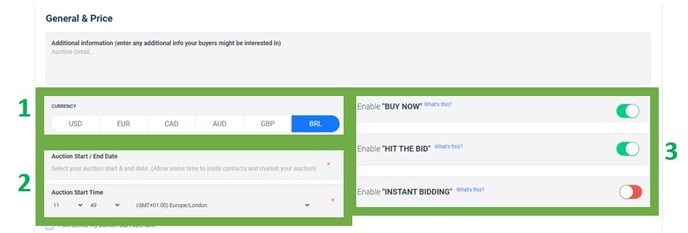
General & Price- This section allows you to set auction currency (1), Auction duration and start time (2) and if you wish to include “BUY NOW”, “HIT THE BID” (what is this?) and “INSTANT BIDDING” (3).
Turn on your instant bid registration if you would like any interested bidders to register to bid in your auction-without your prior approval. Turn it off if you want to approve your bidders first before letting them into your auction.
Policy & Post Settings- This step allows you to choose who can see your auction. All your options are listed for where the auction will be promoted. Should you only want your connections to see your profile in the auction and if you wish to share the auction in your newsfeed and tag your connections to ensure they do not miss this auction. These are explained in more detail here.
The create auction page gives you the option to choose to either assign of transfer the auction to your co-workers.

I don’t have any sale or rental listings to convert to an auction listing, what should I do?
To create an auction listing, you must first create a regular listing. There are two ways in which you can add your listings:
Click the “Create Listing” button at the top of your screen (1) and follow the form on your screen.
Go to your main navigation dashboard on the left-hand side of your screen, click on “My Listings” (2) then click “Add Listing” (3)

Time Event
A Time Event is an auction that includes multiple lots. Users can register for one event and bid on multiple lots with a single registration.
Before Creating your Time Event
Before diving into the Time Event creation process, ensure you have your individual listings prepared.
1. Creating Listing Groups
How do I group my listings?
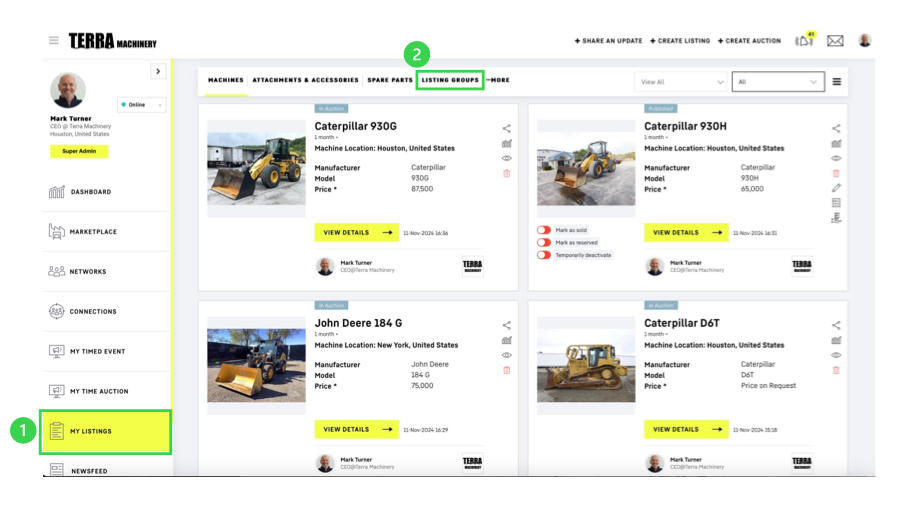
Go to your main navigation bar on the left-hand side of your screen, click on “My Listings” (1) then click “Listing Groups” (2).
You will land in the following page, and you should click on ‘Create Listing Group’.
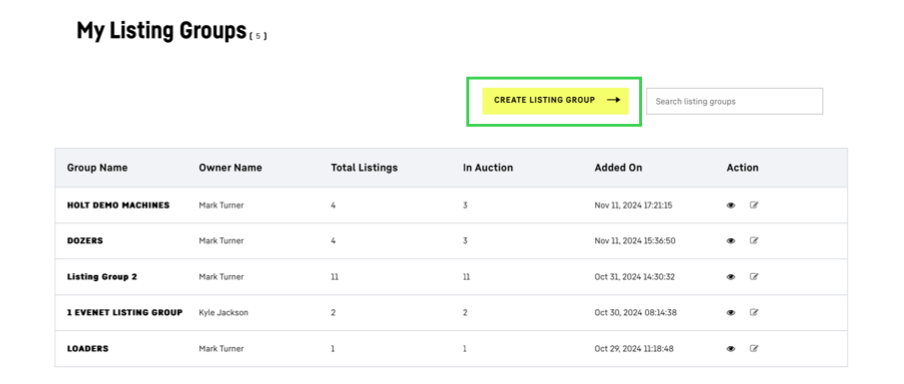
You will now see a page like this one emerging:
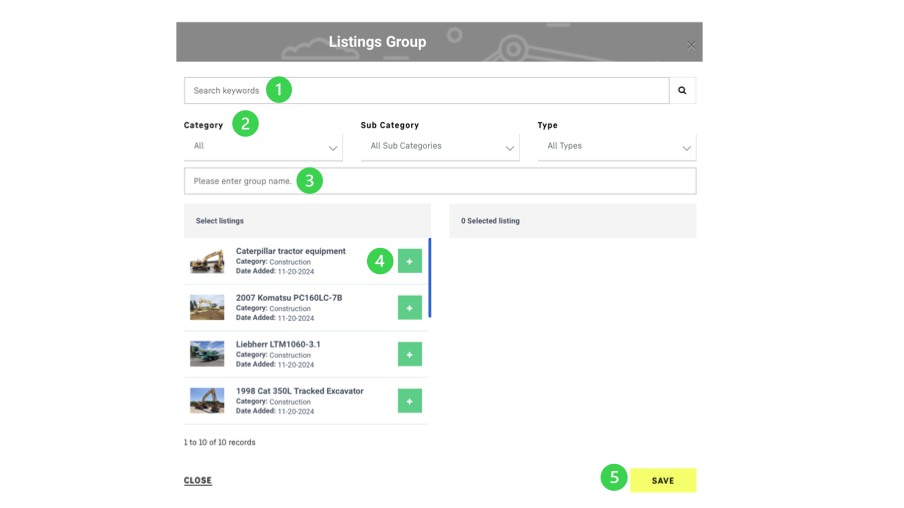
You can filter the listings by Keyword (1) or use the provided filters (2) to locate the listings you want to include in your group. Enter a Group Name (3), then press the + sign (4) to select the listings and add them to the group. Continue adding all desired listings to your group, then press "Save" (5).
Listing Group Details
Once your groups are created this is what you will see.
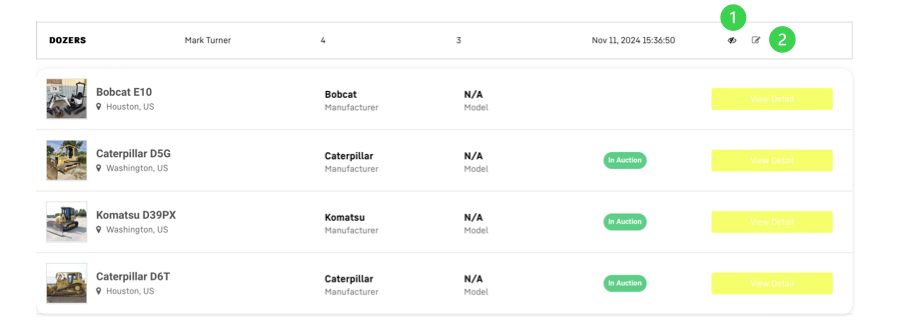
These are the options available for each Listing Group:
View Listings (1) Click on this icon if you would like to see all the listing in your group.
Edit Listing Group (2) Click on this icon if you would like to edit the group.
How do I create a time event?
To create your Time Event you have two ways to achieve this.
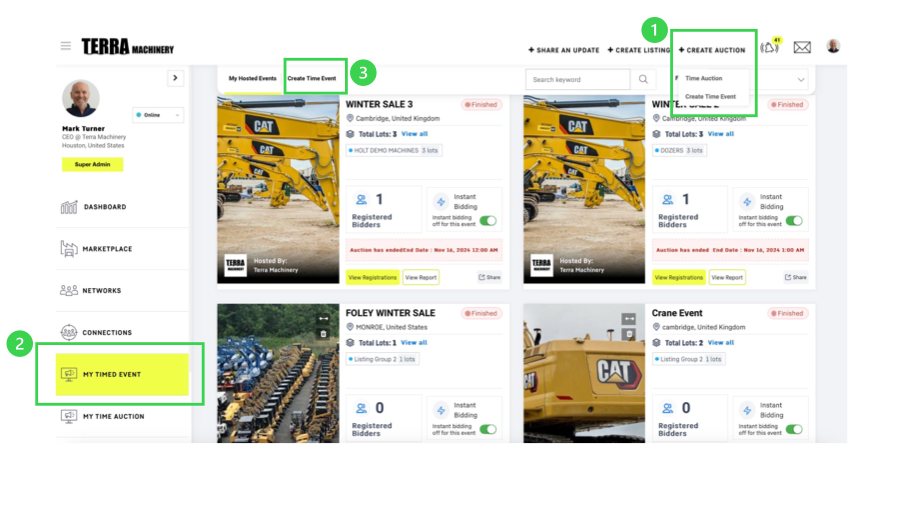
A) Click on the “Create Auction” button at the top right-hand corner of your screen (1) and choose “Create Time Event”.
B) Go to your main navigation bar on the left-hand side of your screen, select “My Timed Event” (2). From here you can click on “Create Time Event” at the top of the page along1side “My Hosted Events”(3).
Follow these next steps.
Auction Details
Fill in the event details: Event Name (1), Time Zone (2), Auction Start/End date (3), and Start Time (4). If you don’t have the dates defined yet you can skip field (3) and tick instead the box at the end of the form “I will decide my auction start date later” (5) and define the dates of your auction later.
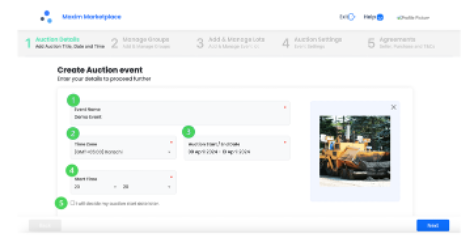
Press ‘Next’
Manage Groups
Add the groups of listings that you would like to be part of the Time Event by ticking the boxes to the right. These groups must be created in advance.
In the second column “Total Listing in Group” you can see the total number of listings in each group.
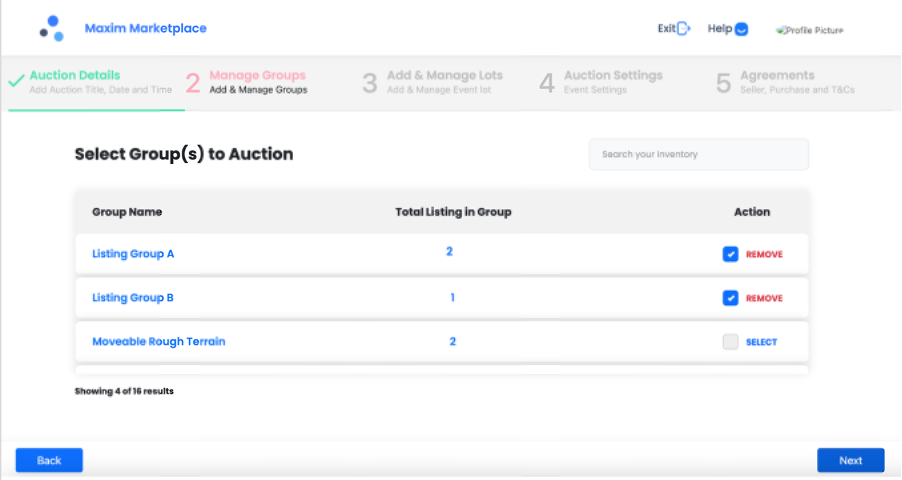
Press ‘Next’
Add and Manage Lots
Manage and organize your lots. You can drag and drop groups to change their order in the Time Event.
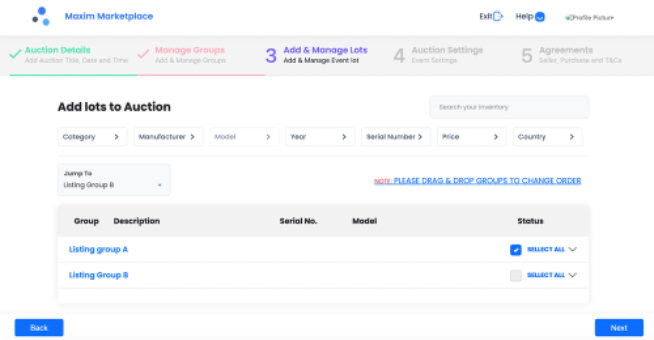
In the Status column you can click on the arrow next to ‘SELECT ALL’ to see all the listings in your lot and decide which listings of each group you want to be in the event. If you want all the listings from your group just tick the ‘Select All’ box. If you just want certain listings from your group, tick in the bock to Select or Remove, depending on the case.
Repeat with all your groups.
Press ‘Next’
Manage Bucket
In this section you can manage the settings that were previously managed while creating a one- item auction, but this time you will be able to do it for the whole group in the same place.
The platform will assign a lot number to each listing, following the order in which you have organized the listing groups and listings inside each group. In this section of the process, you can drag and drop listings to organize them in the order you want them to appear.
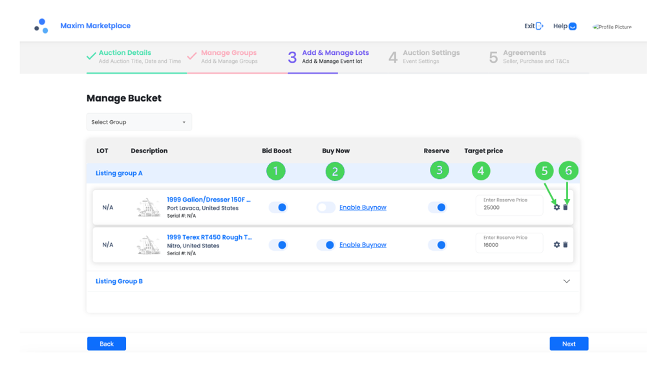
You can activate the Bid boost toggle (1)
You can enable the Buy now functionality (2)
You can enable the Reserve Price toggle (3). If you enabled the Reserve Price, you will be able to set a Reserve Price (4). If you didn’t enable the Reserve Price you will still need to log an Estimated Price for your machine in the squared box (4), otherwise the platform will not let you continue into the next section.
Manage Bid Increment Table options (5)
Delete the listing from the group (6)
Repeat for all groups.
Press ‘Next’
Auction Settings
In this section you will manage your Auction Settings:
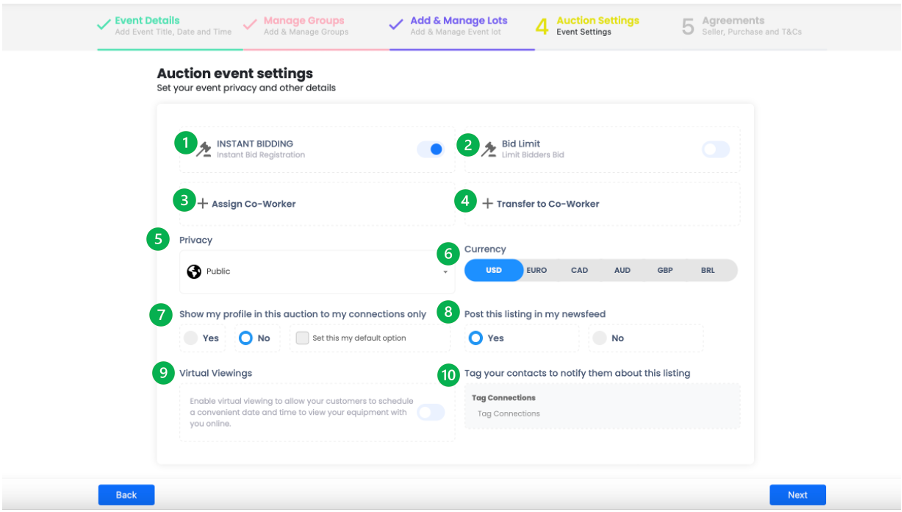
Instant Bidding Registration (1) 'Turn on' your instant bid registration if you would like any interested bidders to bid in your auction, without your prior approval. 'Turn off' instant bid registration to approve bidders to bid in your auction without approval. [AS1]
Bid Limit (2) Enable your Bid Limit option if you want to set a Bid Limit for bidders in the event.[AS2]
Assign to Co-worker (3) Assigning the event allows you to you retain ownership of the auction but also have someone else from your team start working on it too.
Transfer to Co-worker (4) Transferring an event will give someone in your team full ownership of the auction.
Privacy (5) Manage your event privacy. Make your auction Public, available only to your Connections, your Co-workers, etc.
Currency (6) Select the currency in which you will conduct the auction.
Show my profile in this listing to my connections only (7). Please specify whether you would like your profile to be visible exclusively to your connections in the auction listings or if it will be visible to anyone participating in the event, regardless of whether they are your connection.
Post this listing in my newsfeed (8) Decide whether you want to share the event with your connections on your newsfeed.
Virtual Viewings (9): Enable Virtual Viewings to allow users to schedule calls for virtual equipment viewing.
Tag your connections to notify them about this tag (10) By tagging your connections in the auction, you increase the likelihood of them not missing the event.
Press ‘Next’
Agreements
In this section, you can manage the following legal documents for your event. You have the option to create your own documents or utilize Krank’s templates to tailor them to your specific terms. Save them for future use as needed:
a) Seller Declaration: Create your own Seller declaration or adapt Krank template to your needs.
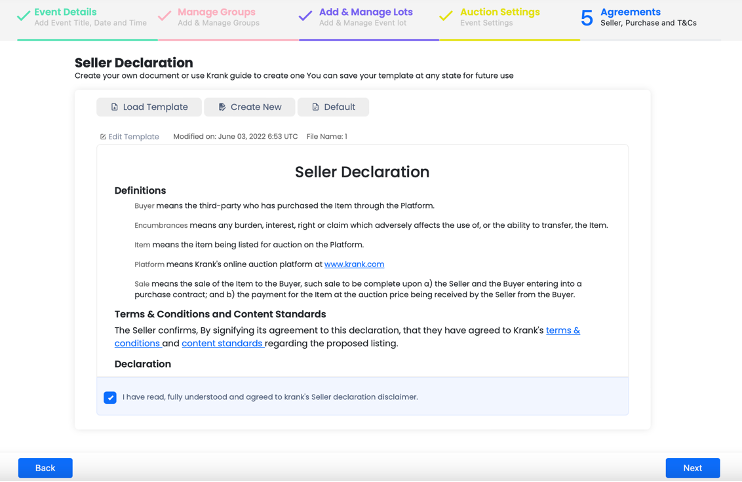
Read and check the Krank Seller Declaration disclaimer at the bottom of the page.
b) Purchase Declaration: Create your own Purchase Declaration or adapt Krank template to your needs.
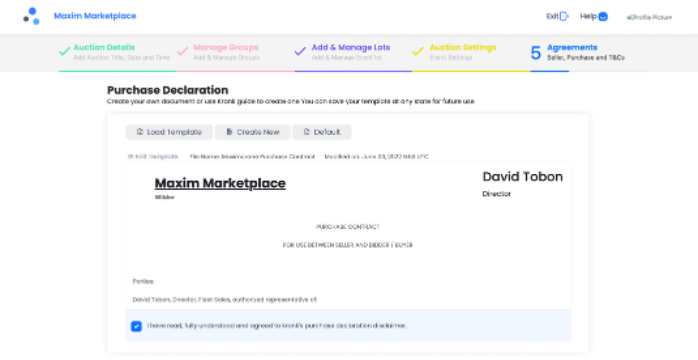
Read and check the Krank Purchase Declaration disclaimer at the bottom of the page.
c) Auction Terms and Conditions: Create your own Auction Terms and Conditions or adapt Krank template to your needs.
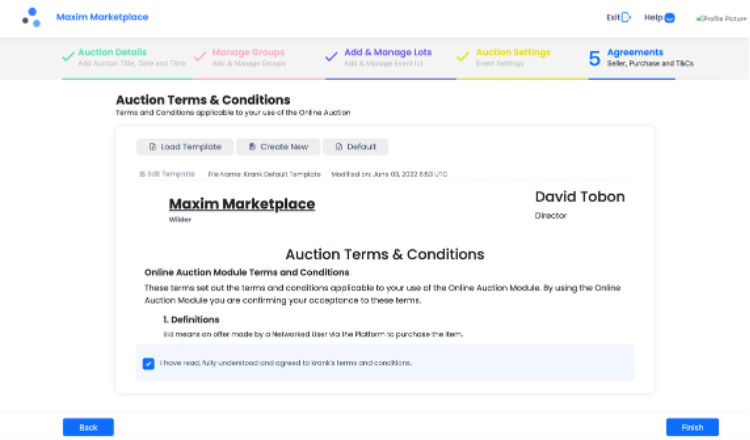
Read and check the Krank Terms and Conditions at the bottom of the page.
Press ‘Finish’.
How will my published Time Event look?
This is how your event will look once it gets published. Let’s look at the information it is providing:
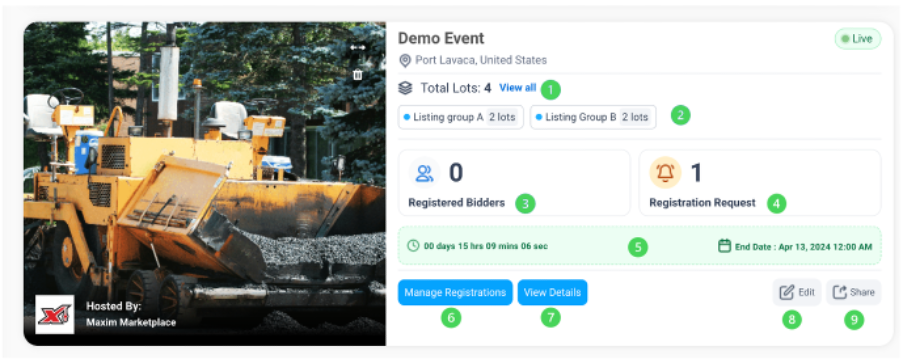
Total Lots/View All (1): Number of total lots in the Event /Click here to see all the individual listings in the event.
Listing Groups (2): View all the listing groups you've selected to participate in the auction. They will be displayed in the order you organized them.
Registered Bidders (3): View the number of registered participants.
Registration Request (4): View the number of registration requests.
Countdown to the start/end of the event (5): Countdown timer displaying the time remaining until the Event start or ends.
Manage Registrations (6): View pending requests, total registrations, and bid increment requests.
View Details (7): Click on this button to view all the listings in the event.
Edit (8): Edit your event. You will be taken back to the Time Event Wizard.
Share (9): Share your event across different platforms (e.g. Facebook, LinkedIn, ‘X’ (formerly Twitter), Maxim Marketplace).